How to Create a Course
Overview:
Please refer to this guide to upload your course on Wisdome. The first step shows you how to create a course folder. Additional guides are linked at the end of this document to help you create your modules and upload lessons.
Wisdome Course Features:
Here's a summary of functionalities that will enable you to deliver engaging courses to your audience:
- Course module (Modules are sections within your courses, similar to chapters in a book.)
- Course lessons
- Upload lesson files such as videos, text files and images
- Attach additional resource files
- Rich text editor with the following functionalities:
-
Change font size
-
Select font format
-
Add images, video and audio files
-
View backend code
-
Select full-screen mode
-
Preview your work
-
Print
-
Change text height
-
Embed links
-
Embed HTML
The Process:
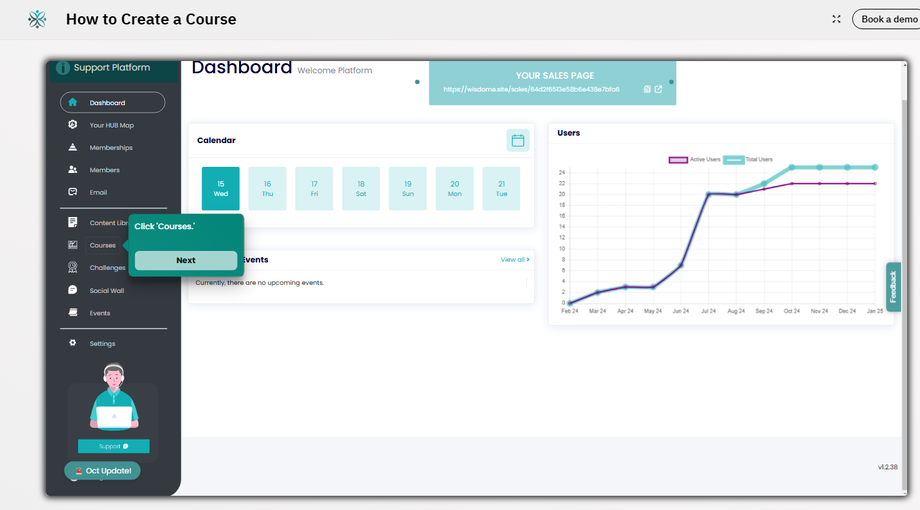
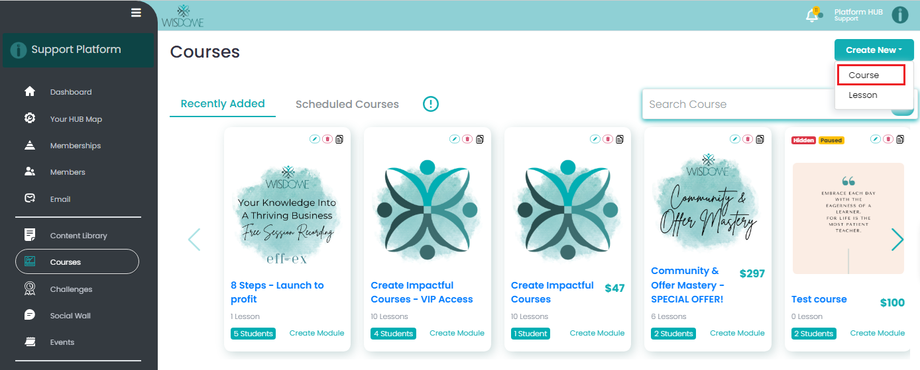
1. From your Dashboard, go to Courses and select ‘Create New' and select 'Course'.
2. Add the following information:
-
Course Title (50 characters max)
-
Short Description (Max of 150 characters)
-
Description (Max 1500 Characters)
-
Course cover image (must be 500 X500 px)
-
Schedule date
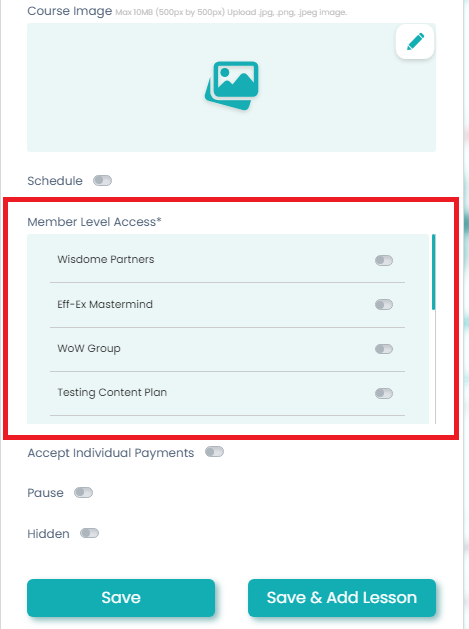
4. Choosing a 'Member Level Access'
Select 'Member Level Access' if you're offering this course through a membership model.
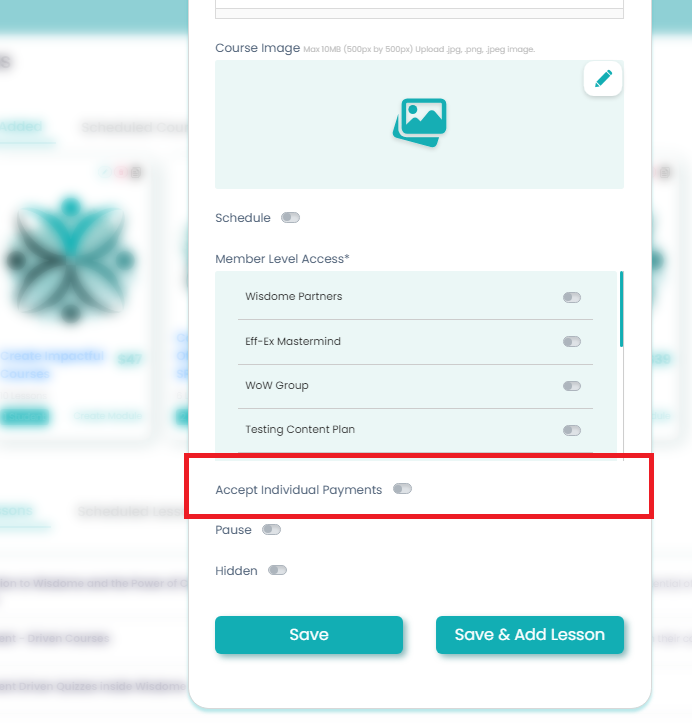
5. Select 'Accept Individual Payments' if you wish to sell your course individually instead of offering it as part of a membership.
Note:
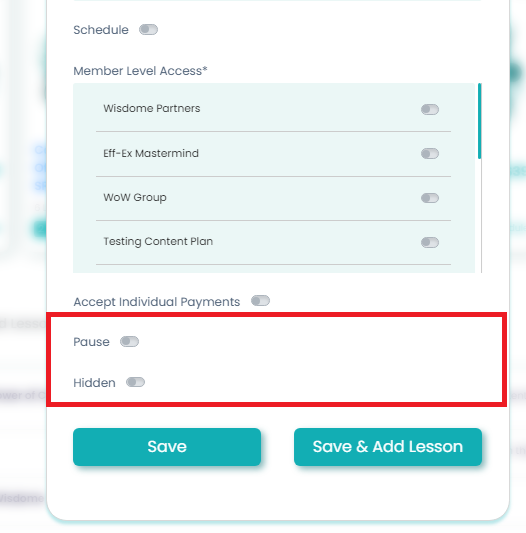
You may activate the 'Pause' option if you don't want new people to see your course. Pausing a course means that existing learners enrolled in your course will still have access to it.
*Activating the 'Hidden' option means your course will be hidden from everyone.
6. Click 'Save.'
Related Articles
How To Add Lessons to Course Modules
How to Update Your Course Pricing

