How to Create Coupon Codes
Use our demo below to navigate the steps.
To expand the screen, please click on the (small) black circle icon to the right of the DEMO
Process Guide:
1. Access the Coupon Settings
-
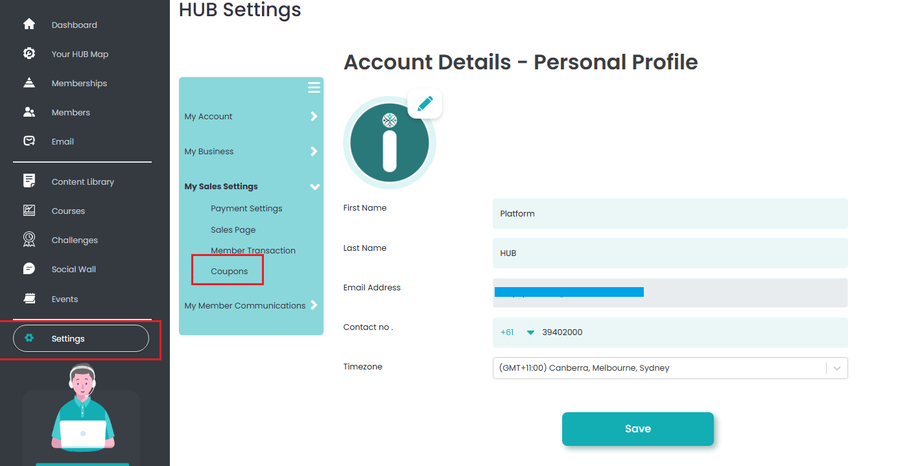
Select Settings from the dashboard menu.
-
Click Coupons.
2. Add a New Coupon
-
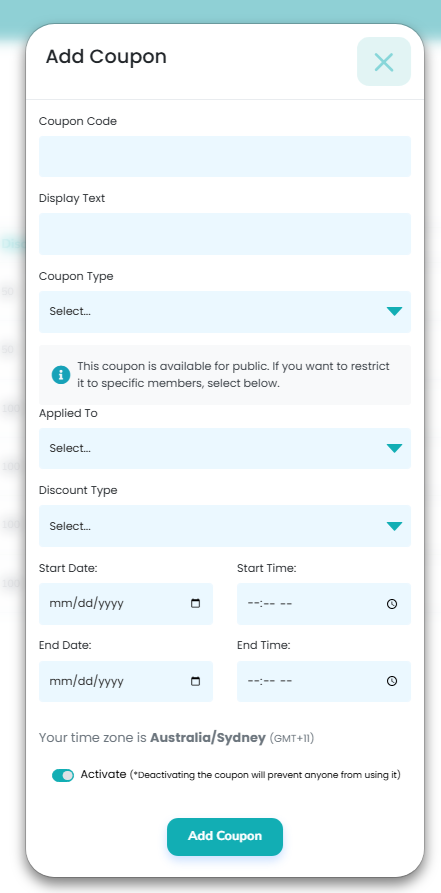
Click Add Coupon to create a new coupon code.
3. Enter Coupon Details
-
Coupon Code: Enter your coupon code.
-
Display Text: Enter a brief description of your coupon code.
Note:
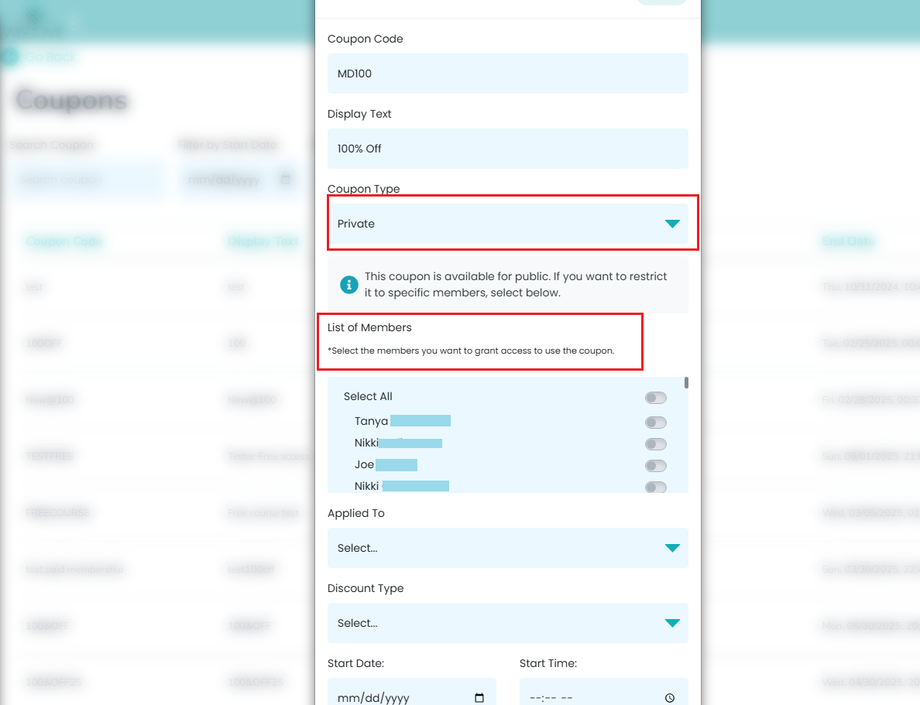
By default, all coupon codes are public and can be used by anyone. To restrict a code to a specific person:
-
Go to the 'Coupon Type' section.
-
Select Private.
-
Enable the radio button next to the name of the person you want to assign the code to. This ensures only the selected individual can use the coupon.
4. Select Applicable Products or Services
In the Applied to section, choose the type of product or service the coupon will apply to. The options are:
-
Subscriptions – Create discount codes for memberships.
-
Courses – Apply codes to individual courses.
-
Events – Use codes for paid events only.
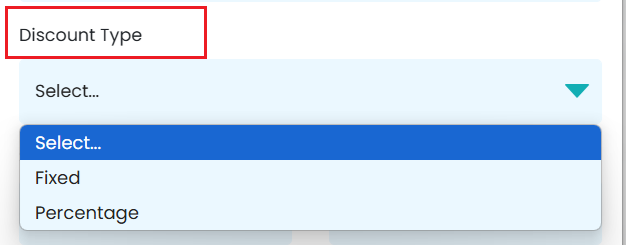
5. Set the Discount Type
-
Choose Percentage to set a discount between 1–100%.
-
Select 'Fixed' if your discount is a specific dollar amount.
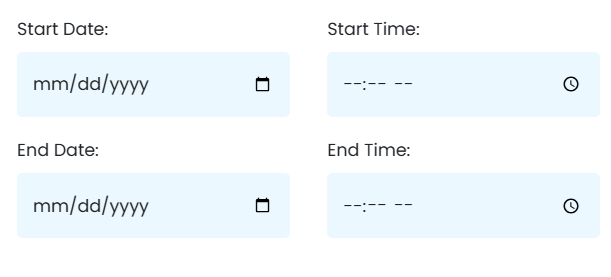
6. Define the Validity Period
Set the expiration date and time of your coupon code.
7. Activate the Coupon
-
Turn on the 'Activate' toggle.
8. Save Details
-
Click Add Coupon to save and activate the coupon code.
Friendly Reminders:
-
Double-check all coupon details before activating to ensure accuracy.
-
Coupon codes are public by default. Use the toggle to limit access to specific members if needed.
-
Deactivate expired coupons to avoid confusion in the future.

