How to Create a Subscriber Form to Collect Leads for Your Business
Please Check Out the Demo Below:
Overview:
Use our step-by-step guide to create your subscriber form and use it to:
-
Capture new leads
-
Set up an automatic welcome email
-
Embed the form on WordPress and other pages that accept HTML code
Part 1: Creating Your Automated Email Template
The first step in this process is to create a template for your automated email. Here’s how:
1. Login to: https://partner.wisdome.site/login
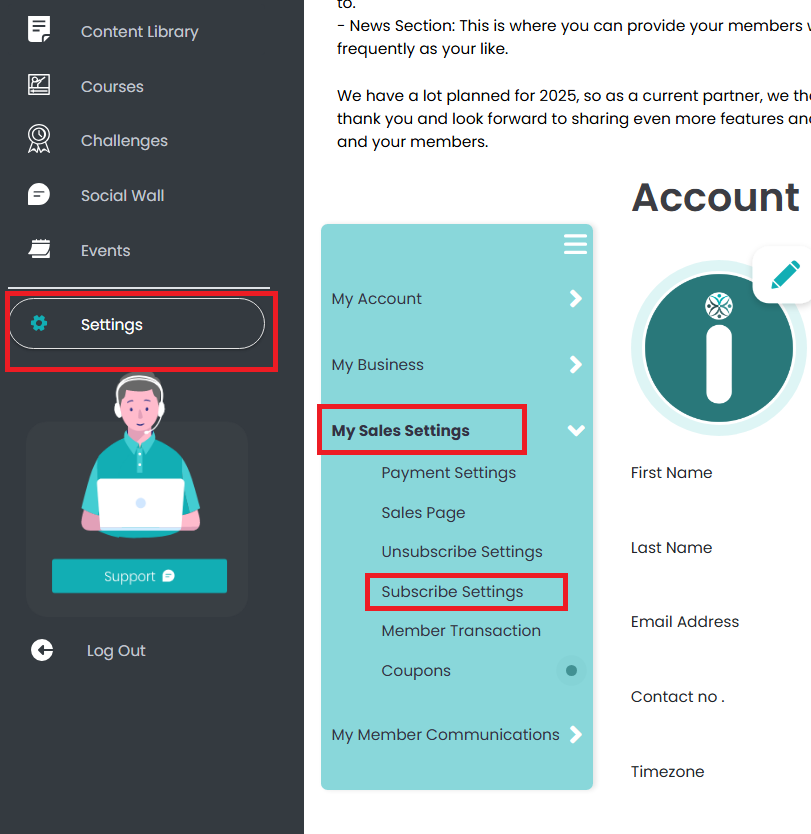
2. Go to ‘Settings’ → ‘My Sales Settings’ → ‘Subscribe Settings.’
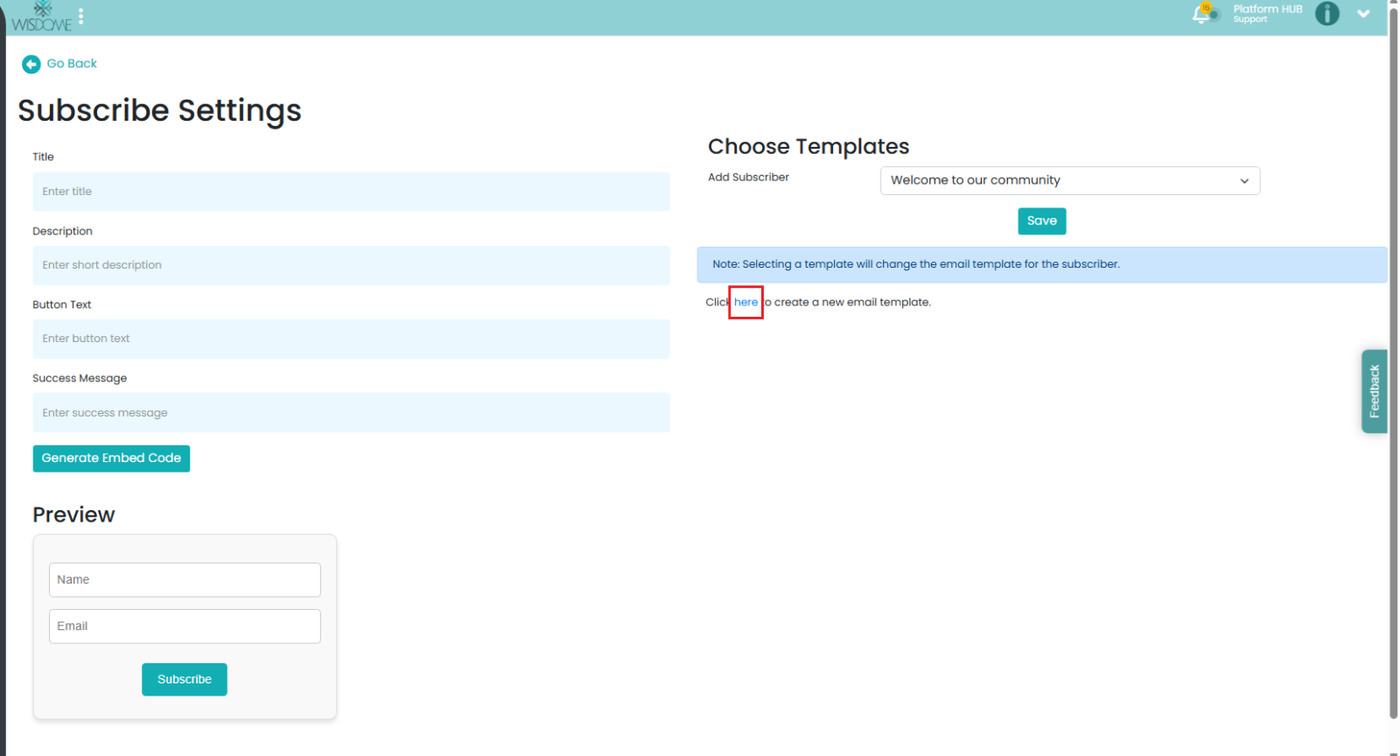
3. Create an automated email template
You’ll need an automated email template. This is the email that will be automatically sent to your subscribers once they sign up.
Click 'here' to get to the email template settings.
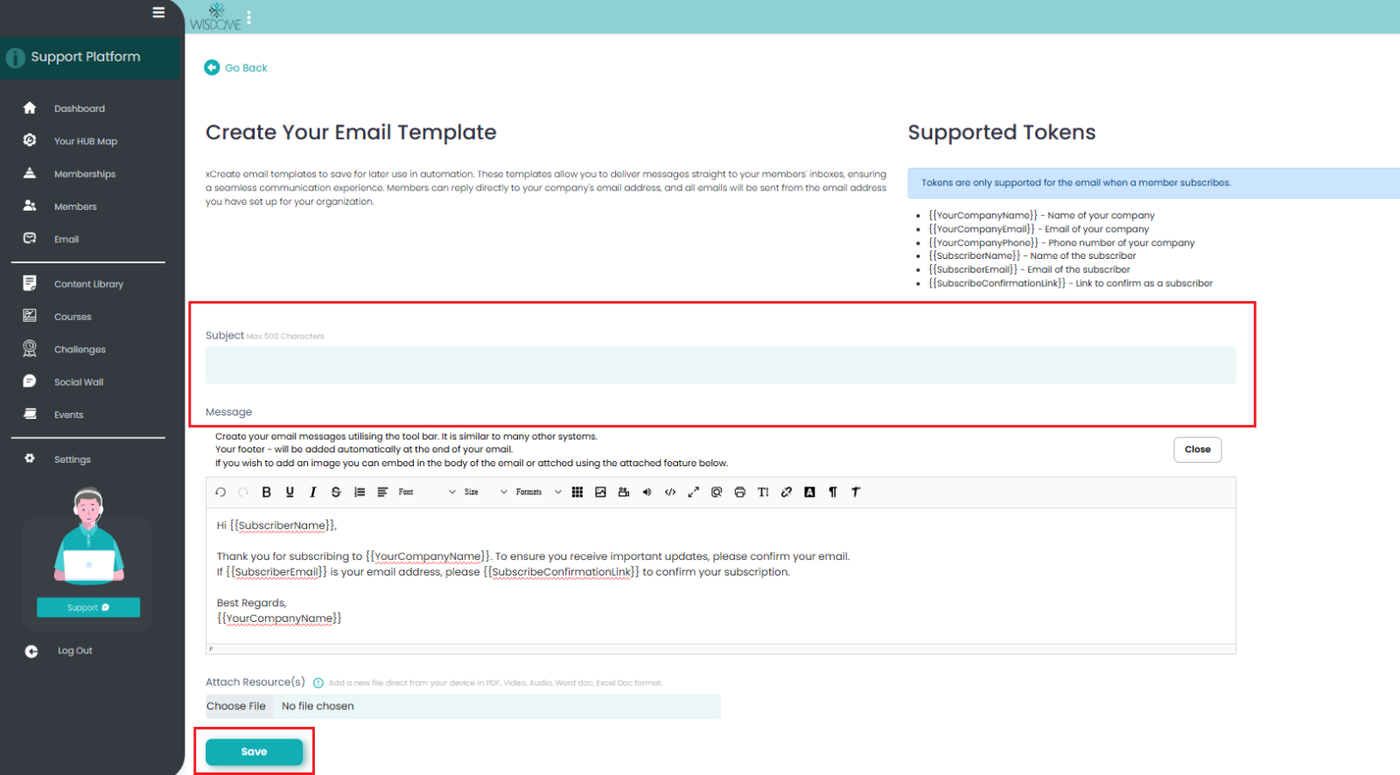
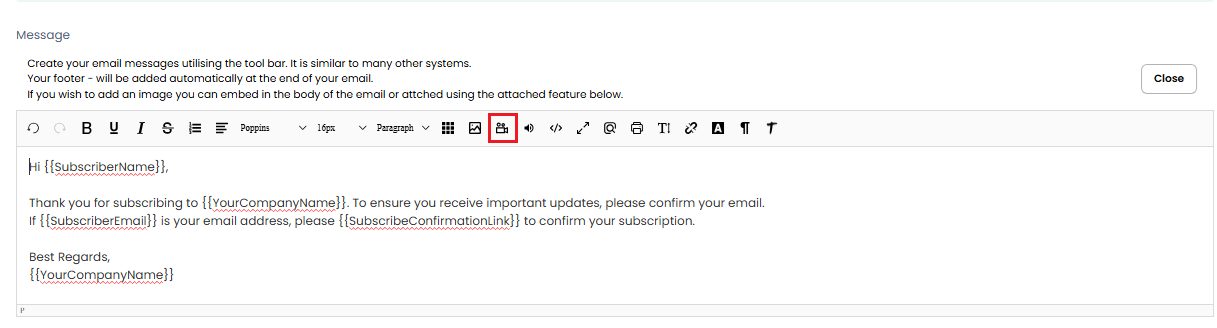
4. Fill out the following information:
-
-
Email subject line
-
Email body (You may tweak the message to suit your brand’s message, but please keep the text within curly brackets {} intact. This allows the system to auto-fill important details such as:
-
Subscriber name
-
Company name
-
Subscriber email
-
Subscription Confirmation link
-
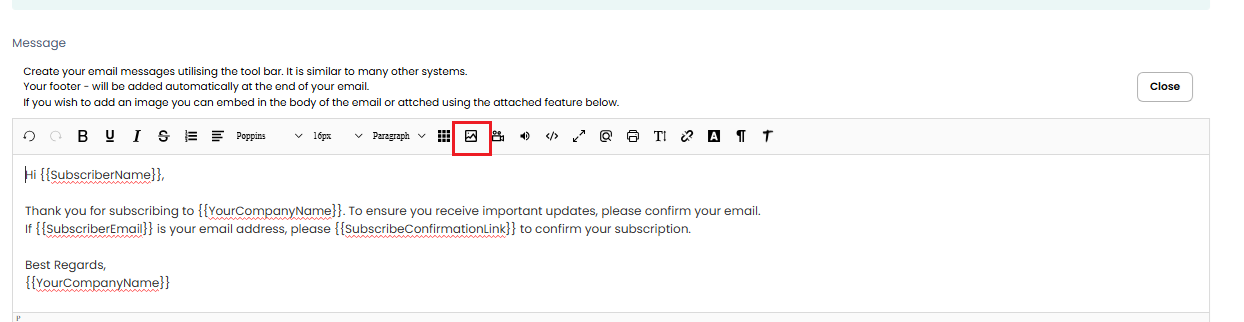
5. If you wish to embed an image:
-
-
Click the image icon
-
Upload your image file
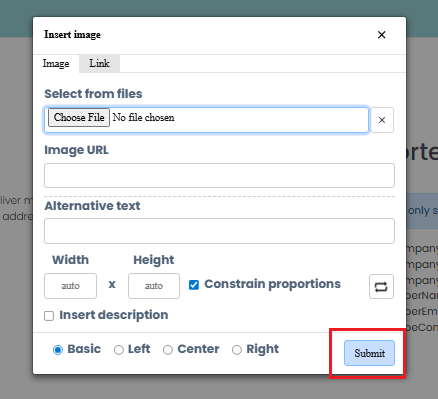
-
Click Submit
-
-

Part 2: Steps to Create Your Subscriber Form:
1. Fill in the form fields:
-
-
Title – This will appear at the top of your form.
-
Description – A short explanation of what your subscription offers.
-
Button Text – This is the message shown on the subscribe button (e.g. “Join Now” or “Subscribe Today”).
-
Success Message – The confirmation message your subscriber sees after submitting the form.
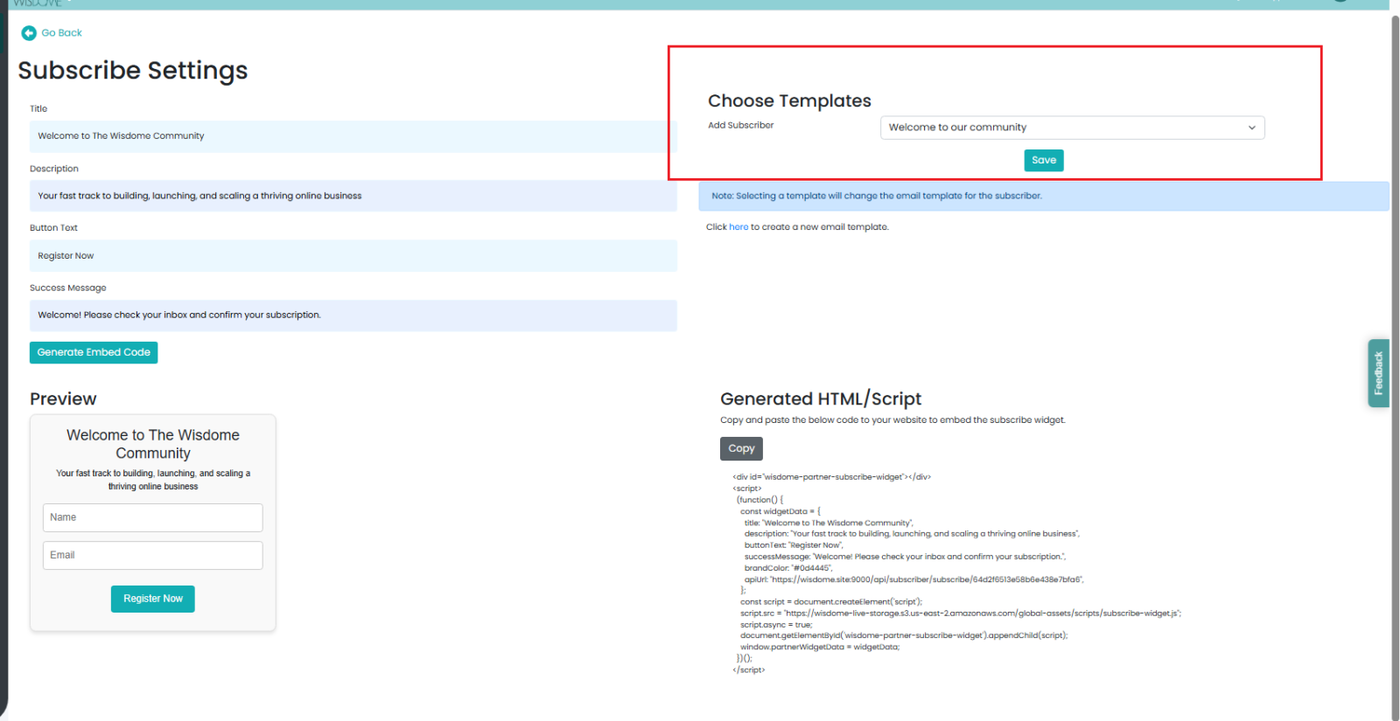
2. Choose a template and click 'Save.'
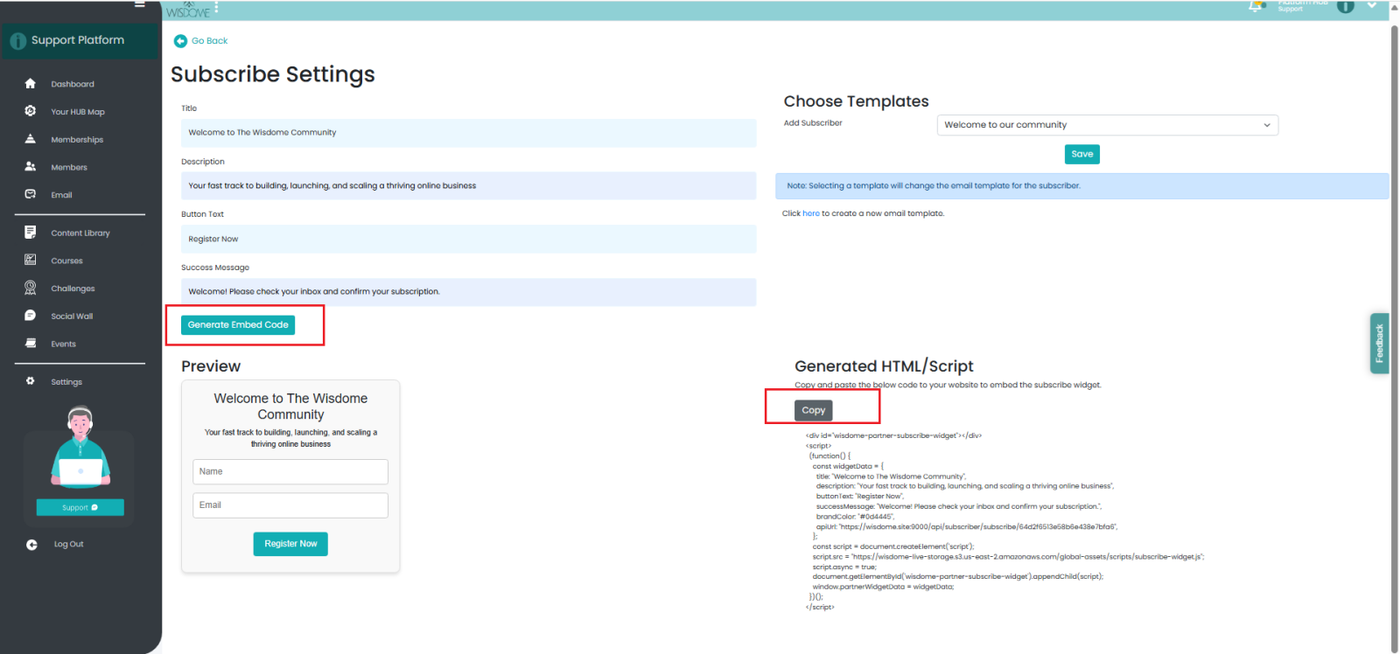
3. Click 'Copy' to copy your HTML Code.
Part 3: How to Embed Your Form on a WordPress Landing Page
-
Go to the page where you want to add the form.
-
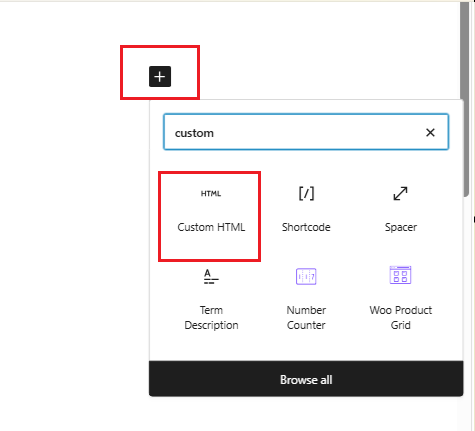
Click the ‘+’ icon to add a new block.
-
In the search bar, type and select ‘Custom HTML’.
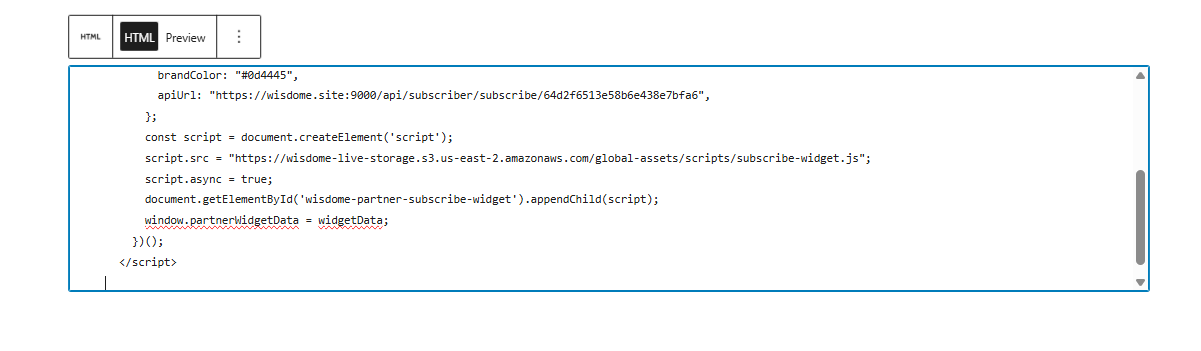
3. Paste your HTML code into the box.
4. Click ‘Publish’ to make it live.

This is what a live form looks like.