Create Plug and Play Course Quizzes in Minutes Using Embedlinq
Goal:
We’ll show you how to build quizzes that capture leads and walk you through the steps to embed them right into your Wisdome course.
Watch Our Demo Here 👇
Phase 1: Building Your Quiz
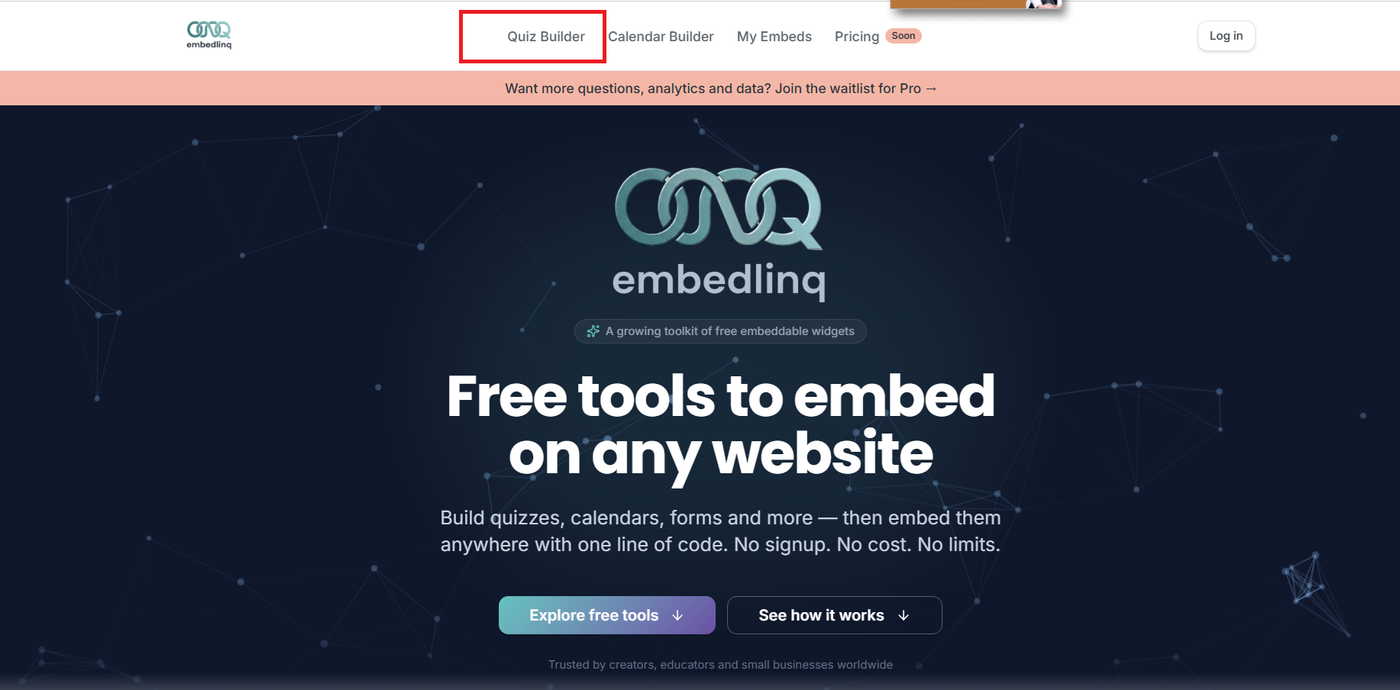
1. Access the Tool: Head over to embedlink.com and go to the Quiz Builder.
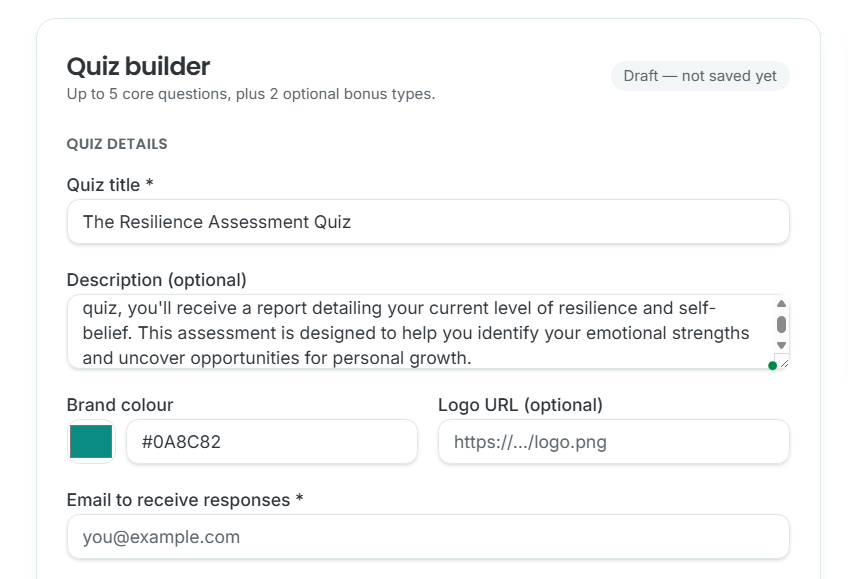
2. Define the Basics:
Title & Description: Give your quiz a clear name and a short explanation so users know what to expect.
Branding: Customise the colour and add a URL for your logo to keep the look consistent with your brand.
Notification Email: Enter the email address where you want to receive the quiz answers from your students/users.
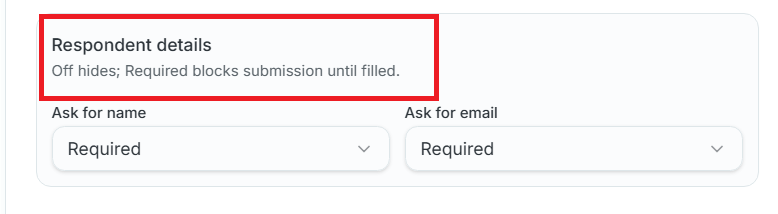
3. Set Up Lead Generation: Under the "Respondent Details" section, select "Required" in the "Name" and "Email" fields. This ensures you capture lead information before users can receive their results.
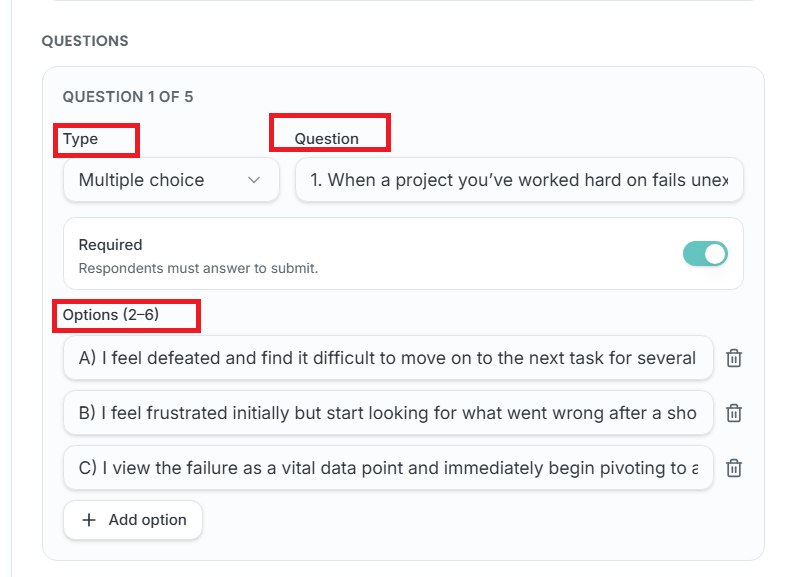
4. Add Your Questions in the "Questions" Field:
Click the dropdown menu under the "Type" field. Choose your format: Open Text, Multiple Choice, or a 1-10 scale.
Type in your question in the "Question" field and provide the answer options in the "Options" field.
(Optional) Click “+ Add option” to add a new answer to your question.
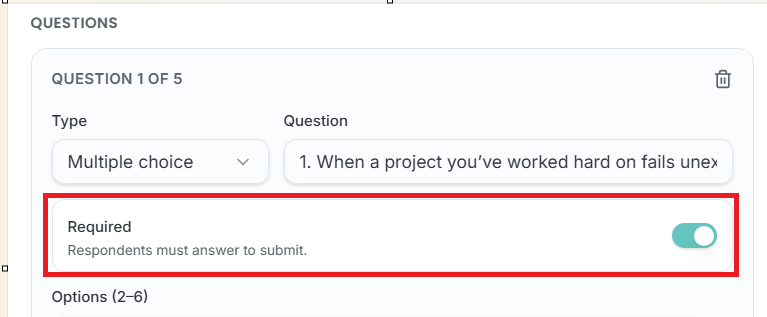
Note: To make answers optional, turn off the Required toggle located below the “question type” section.

Tip:
Click the + Add Question button to expand your quiz. Please ensure you include at least five questions to successfully save and create it.
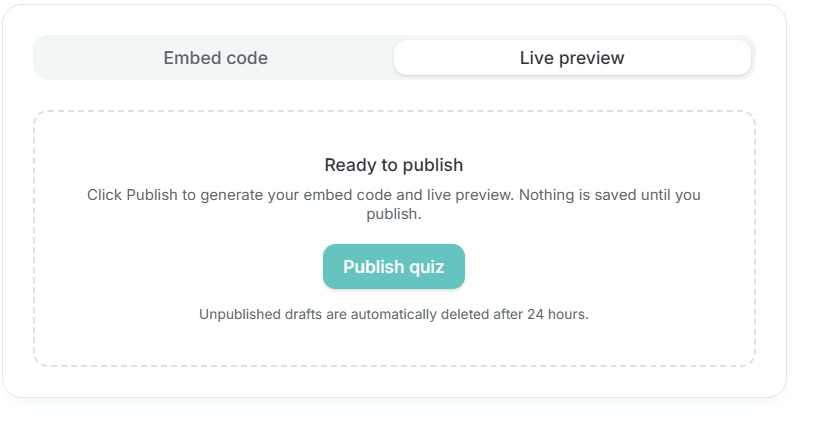
5. Save Your Work: Once you’ve added all your questions, click "Publish" to save the quiz.
Phase 2: Embedding The Quiz Into Your Course
Now that the quiz is built, let's put it where your students/users can see it.
Grab Your HTML Code:
In the Quiz Builder, click the "Embed Code" button.
Pro Tip: Select the "Custom Height" option. It generally provides the cleanest look within course lessons.
Click "Copy Embed Code".
Navigate to Wisdome Admin: Open your Wisdome admin dashboard, go to "Courses", and select the specific course you are working on.
Create the Lesson:
Select the module where the quiz belongs and click "Add Lesson".
Enter a lesson title (e.g., "End of Module Assessment").
Insert the Quiz:
In the "Content" area, switch the editor type to HTML.
Paste the embed code you copied earlier into the field.
Final Touches:
Context: Upload a "Lesson File" (like an image or maybe a video) to give students more context.
Access: Select the appropriate Membership Access Levels if applicable.
Click "Create Lesson".
Phase 3: Managing Results & Lead Capture
What happens after a student hits submit?
User Experience: After answering the questions, students will be prompted to enter their name and email to view their results.
Notification: Once they click submit, an automated email is sent to the address you provided during Phase 1.
Follow-up: As the creator, you can now review their answers and send a personalised reply or interpretation of their quiz results.