
How To Create Events Inside Your Hub
Watch our demo video:

Overview:
Increase customer engagement, promote your services, and build brand visibility with Events on Wisdome.
Use the following functions to create engaging events:
Add event name
Rich text editor with the following functions:
Change font size
Select font format
Add images, video, and audio files
View backend code
Select full-screen mode
Preview your work
Print
Change text height
Embed links
Embed HTML
Set your start date and end date
Choose start time and end finish time
Add a cover image/video
Upload event files (max. 10 MB
Add your live stream link
Check the box that says "Accepting participants."
Choose the "member level access."
Save Event for Repeats
The Process:

1. In your dashboard, go to 'Events' and click 'Add Event.'
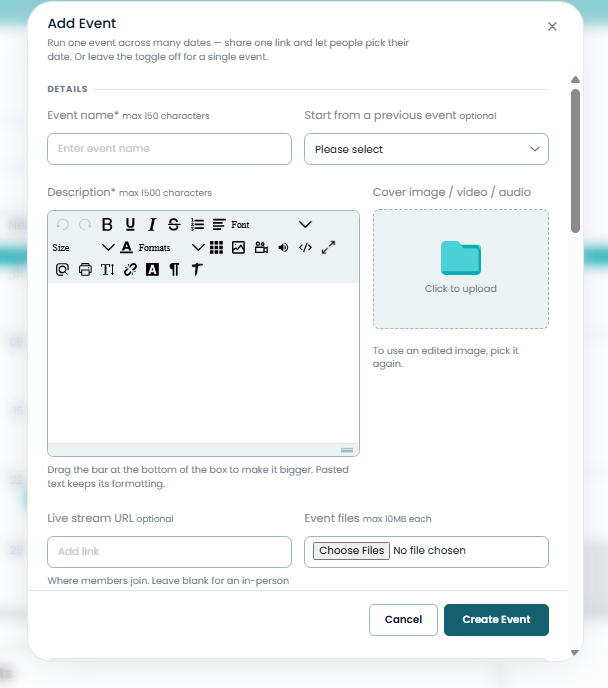
2. Add the following information:
Event Name (Maximum 150 characters).
Start from a previous event (Optional): Select a template or prior event from the dropdown to
prepopulate settings if applicable.
Description: Add details, agenda, or participant instructions (Maximum 1,500 characters).
Cover Image / Video / Audio: Click the upload box to attach promotional cover image or video.
Live Stream URL (Optional): Provide the direct video joining link (Zoom, YouTube Live, Vimeo,etc.) for virtual broadcasts. Leave blank for physical events.
Event Files: Attach downloadable PDF workbooks, slides, or resources (Maximum 10MB)
Your live stream URL
Note: Under the "Add your live stream URL field," you may add your live stream link or any other link you'd like to share, such as a landing page or a website.
3. Single-Session Event Setup
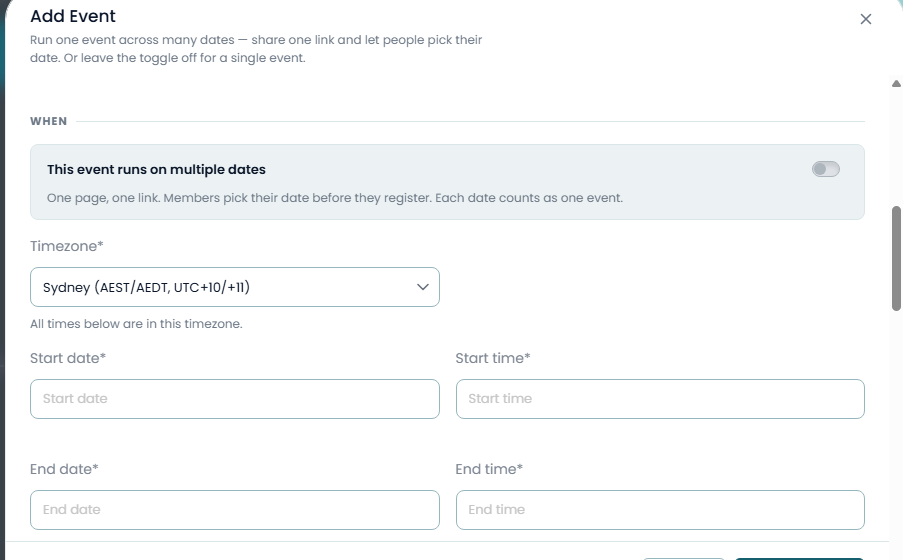
Keep the Multi-Date Toggle OFF: Ensure "This event runs on multiple dates" is switched off.
Set the Timezone: Choose the target timezone from the dropdown menu (e.g., Sydney AEST/AEDT).
Set Start Date & Time
Set End Date & Time
Recurring Event / Series
Use this process for recurring workshops, masterclass series, or recurring community calls:
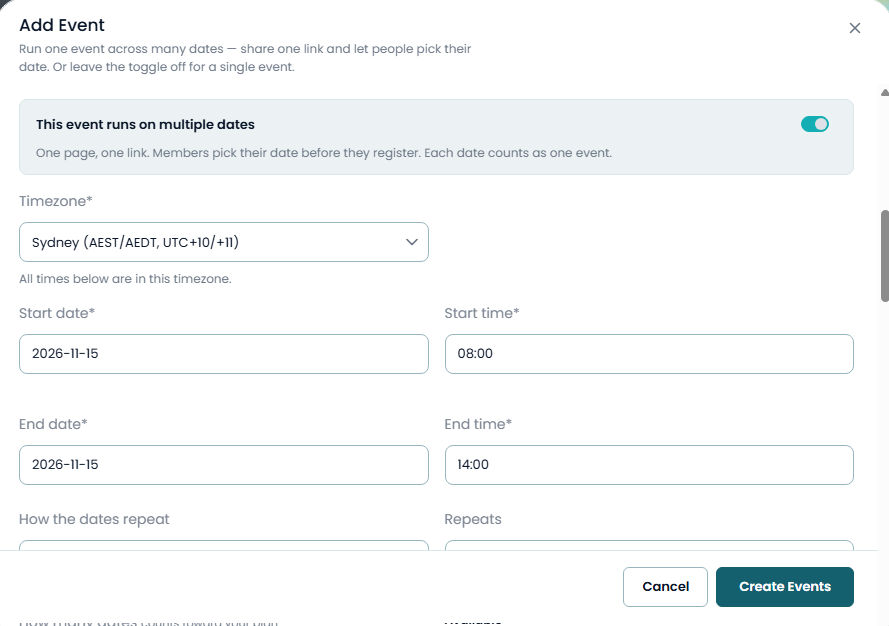
Multi-Date Toggle: Switch the toggle for 'This event runs on multiple dates' to ON.
Timezone:* Select a timezone applicable to all scheduled recurring instances.
Initial Instance: Add the initial Start Date, Start Time, End Date, and End Time for the first session.
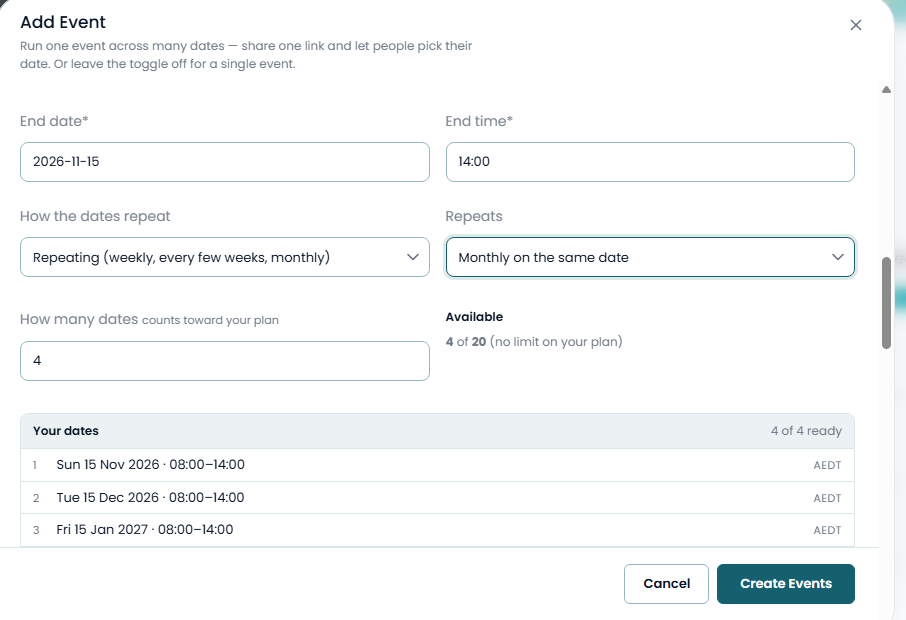
How the dates repeat: Select 'Repeating (weekly, every few weeks, monthly...)' from the dropdown.
Repeats Pattern: Choose the recurrence rule (e.g., 'Monthly on the same weekday').
How many dates count toward your plan: Enter the total number of repeating instances (e.g., '4').
Schedule Review: Verify the generated occurrence list under 'Your dates.'
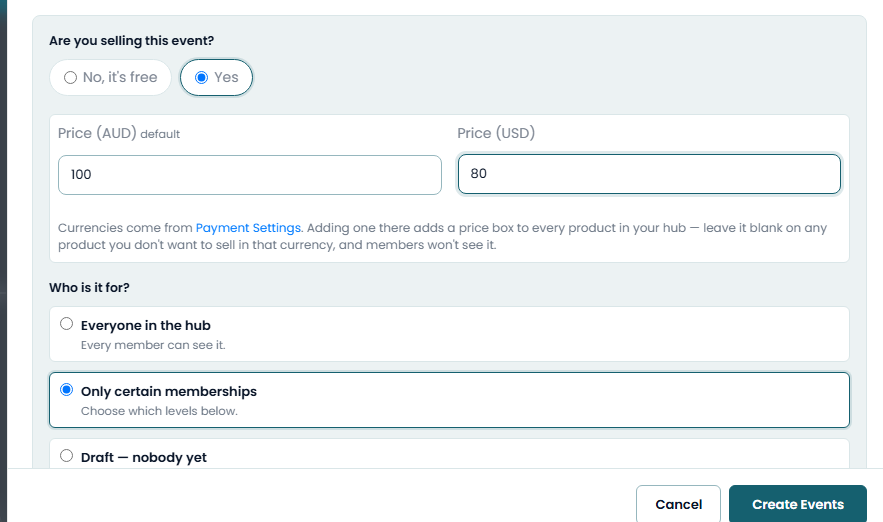
Pricing & Access Setup for Paid Events
Use this section to configure ticket prices and define which membership tiers can view or attend your event.
Are you selling this event?: Select 'Yes' to enable paid ticket options.
Who is it for?: Choose the audience for this event:
Everyone: Public access.
Certain members only: Restricted access based on membership tiers.
Draft: Keep hidden while setting up.
Price: Enter the ticket price amount for each supported currency.
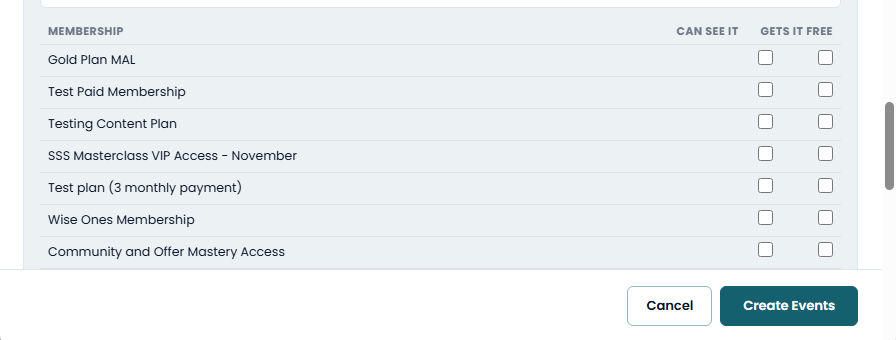
Membership Access & Free Overrides:
CAN SEE IT: Check this box for members who are allowed to buy tickets.
GETS IT FREE: Check this box for VIP members who get automatic free entry.
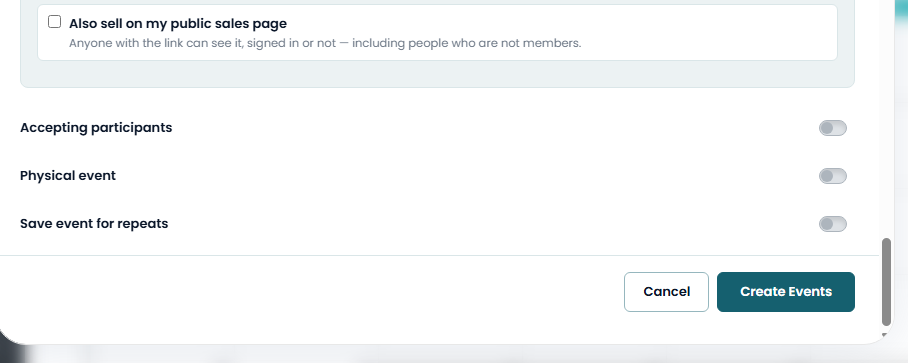
Publishing Toggles & Final Action Complete final publishing settings before saving:
Also sell on my public sales page: Check this option to display your event in your sales page. .
Accepting participants: Toggle ON to enable immediate registrations upon publication.
Physical event: Toggle ON if the event takes place at a physical venue instead of a virtual stream link.
Save event for repeats: Toggle ON to store this event configuration as a template for future duplication.
Create Events: Click 'Create Events' to publish.
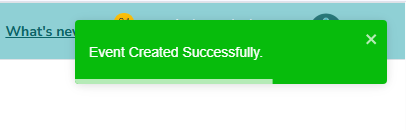
Congratulations! You have successfully created an event.
How to Share Your Event with Your Audience

Step 1: Access Your Events Calendar
Go to ‘Events’ and locate the event you want to share.
Click on the event name.

Step 2: Select the Share Option
Once inside the event details, click the ‘Share’ button. You will see two sharing options:
Event URL
Checkout URL
Step 3: Choose the Right URL to Share
Event URL:
Use this for your existing members who already have access to your knowledge hub. They’ll be prompted to log in to view the event details and register.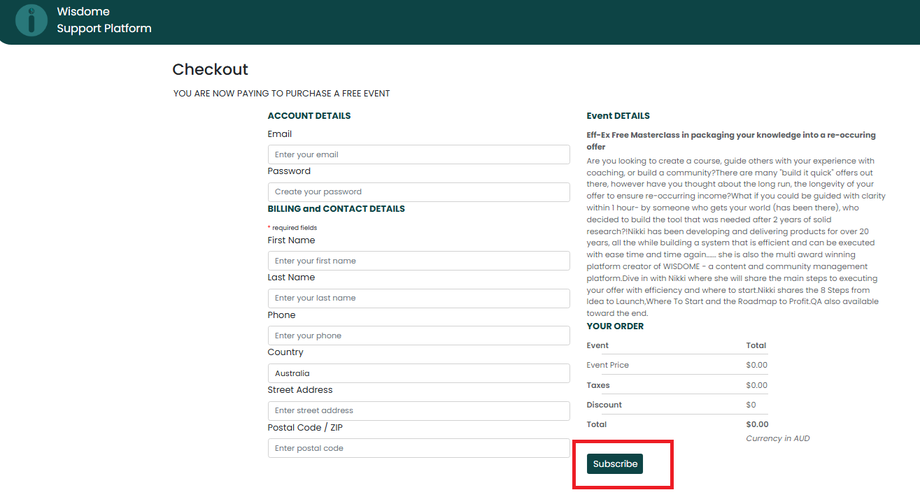
Checkout URL:
Use this for your new audience who are not yet members. They’ll be directed to a page to provide their details and subscribe.
