How to Create a Subscriber Group and Lead Generation Form in Wisdome
Please Check Out the Demo Below:
Purpose: Learn how to create a subscriber group and build a sign-up form/lead form to grow your email list and keep your audience in the loop.
Step 1: Create a Subscriber Group
Grouping subscribers as they sign up makes it simple to send follow-up emails, newsletters, or offers to your audience.
The Process:
Login to: https://partner.wisdome.site/login.
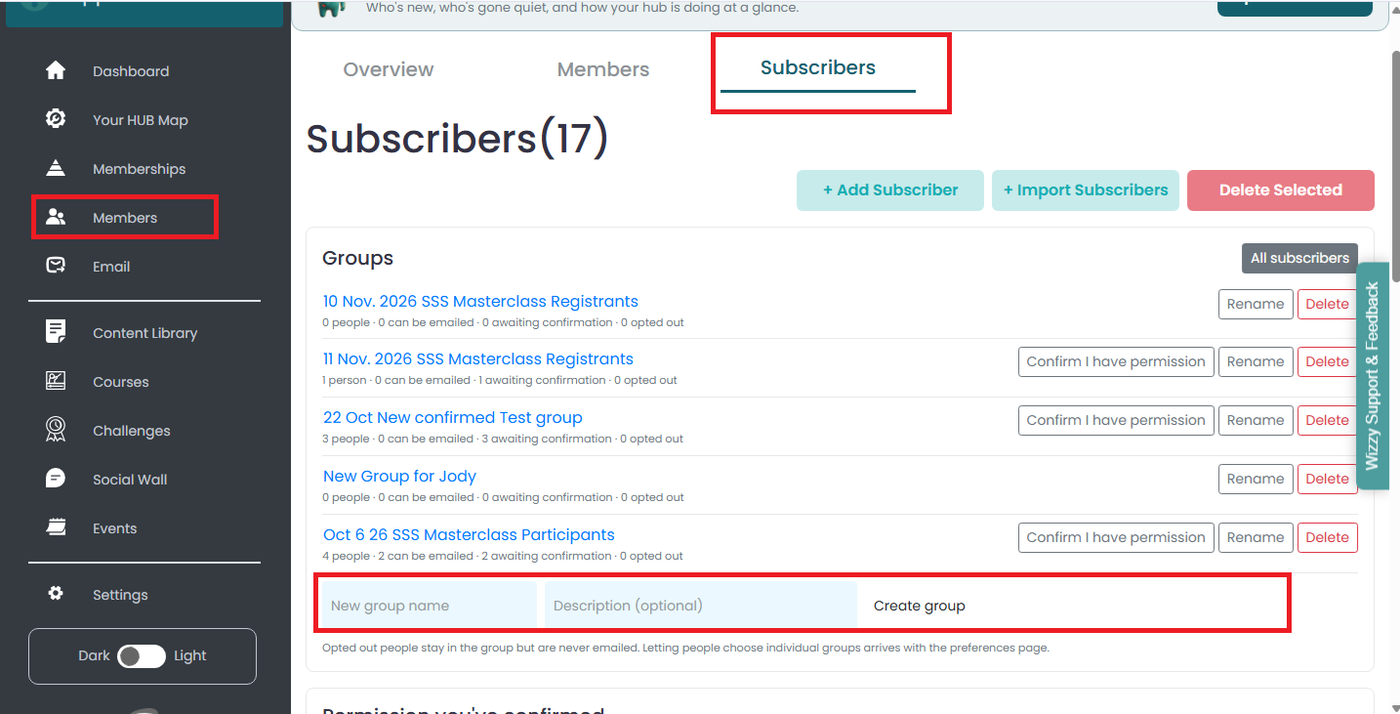
Click Members in the left-hand sidebar menu.
Select the Subscribers tab near the top of the page.
Scroll to the bottom and find the Groups section.
Type a title/name in the New group name box.
Add a short note in the Description (optional) box if you want a reminder of what the group is for.
Click Create group to save it.
Step 2: Open the Lead Forms Section
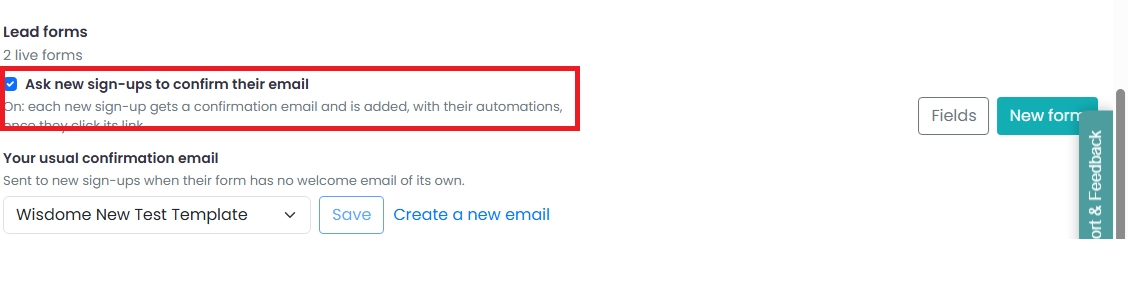
Note: Tick the 'Ask new sign-ups to confirm their email' to confirm their subscription so new sign-ups verify their email address before they are added to your subscriber list.
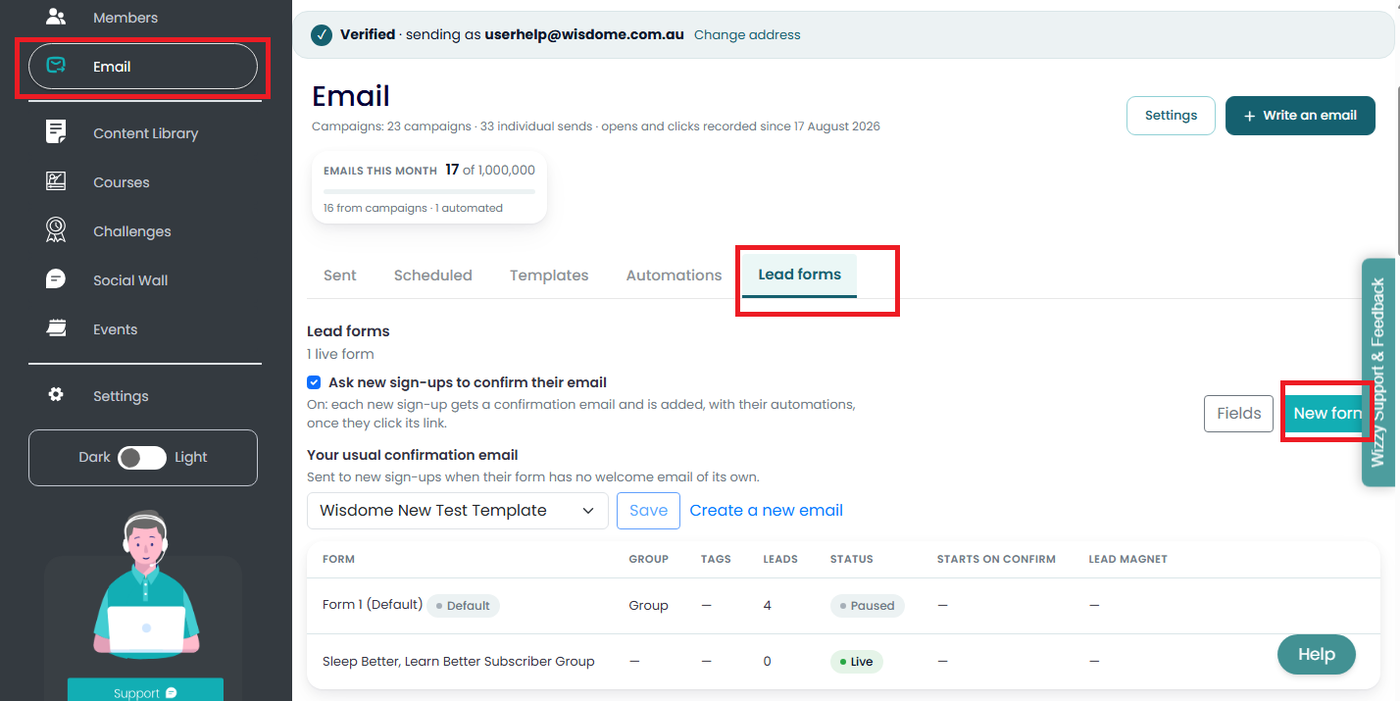
Click Email in the left-hand sidebar menu.
Click the Lead forms tab near the top of the page.
Click the New form button on the right-hand side.
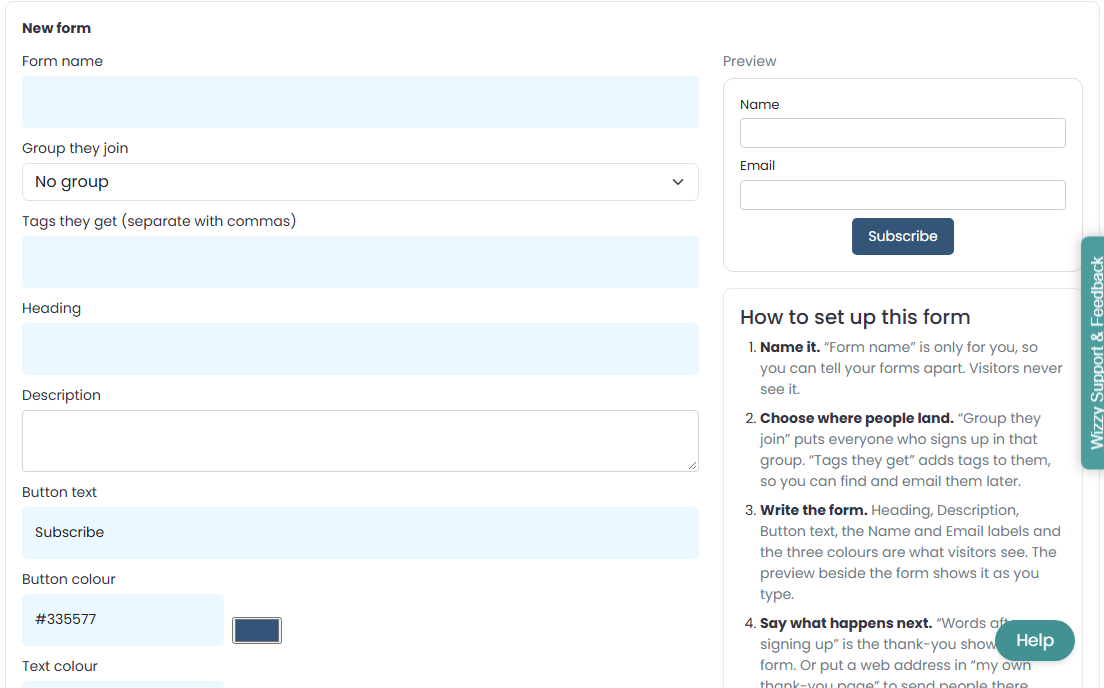
Step 3: Name Your Form and Organise Your Contacts
Note: Scroll down to find the New Form section and fill out all the necessary information.
Form name: Type an internal name for your form. Visitors will not see this. It will just help you tell your forms apart.
Group they join: Open the dropdown menu and select the subscriber group you created in Step 1.
Tags they get: Type any relevant tags (separated by commas) so you can easily find and filter these subscribers later. Example tags: newsletter-signup, website-lead, free-guide etc.
Step 4: Customise Your Lead Form
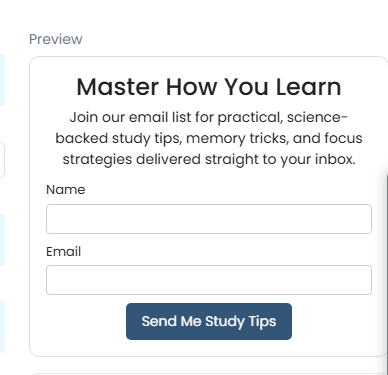
As you fill out these fields, check the Preview box on the right to see how your form will look to visitors.
Heading: Type the main title visitors will see at the top of the form.
Description: Write a short sentence explaining what they get when they sign up.
Button text: Keep it as "Subscribe" or change it to something more specific (e.g., "Get the Free Guide").
Colours: Adjust the Button colour, Text colour, and Background colour using hex codes (like #335577) or by clicking the colour boxes.
Field labels: Leave Name label and Email label as they are, unless you want to change what the boxes say.
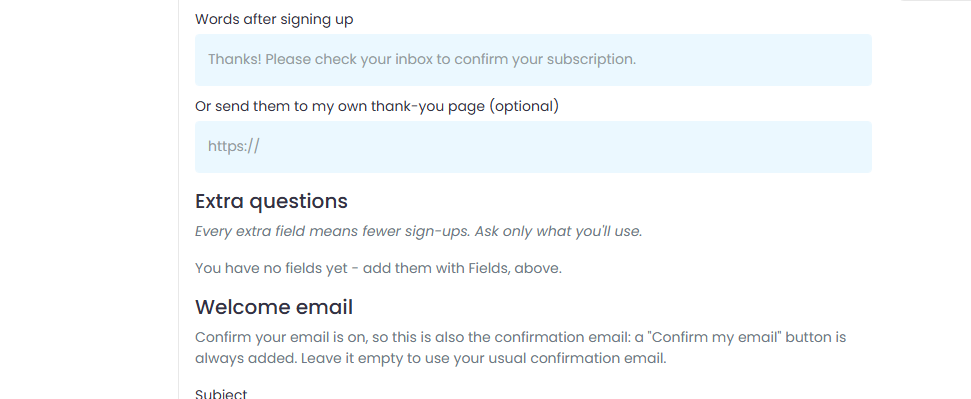
Step 5: Set Up the Confirmation Message and Extra Questions
Words after signing up: Enter the short message visitors see on screen right after they submit the form (e.g., "Thanks! Please check your inbox to confirm your subscription.").
Thank-you page (optional): If you have a custom thank-you webpage, paste the URL here. Otherwise, leave it blank.
Extra questions: Skip this unless you added custom fields earlier. Keep forms short since asking too many questions could discourage people from signing up.
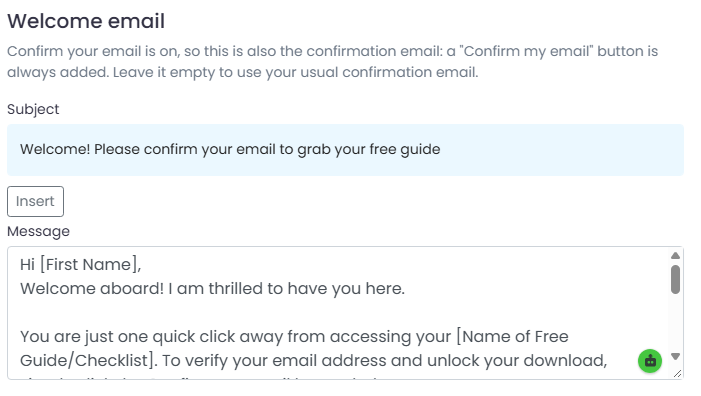
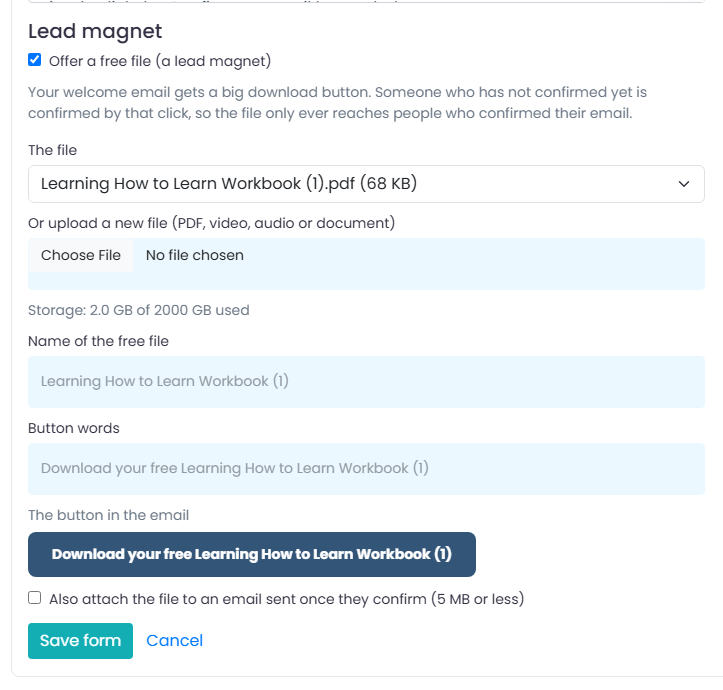
Step 6: Write the Welcome Email and Add a Lead Magnet
Subject: Write a clear email subject line.
Message: Write the email text new subscribers will receive. Wisdome automatically includes a "Confirm my email" button in this email.
Lead magnet (optional): If you are giving away a free file (like a PDF checklist or guide), tick the Offer a free file (a lead magnet) box and upload your file. Subscribers will only get the download button once they click to confirm their email.
Step 7: Save and Publish
Click the Save form button at the bottom of the page.
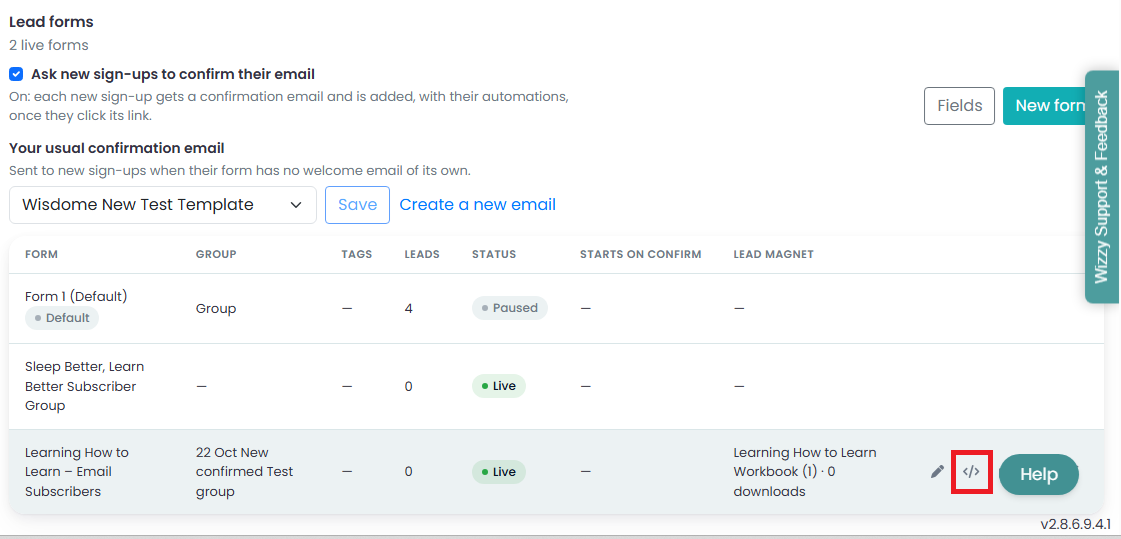
Back on the main Lead forms list, click the </> icon on your new form's row to copy the embed code.
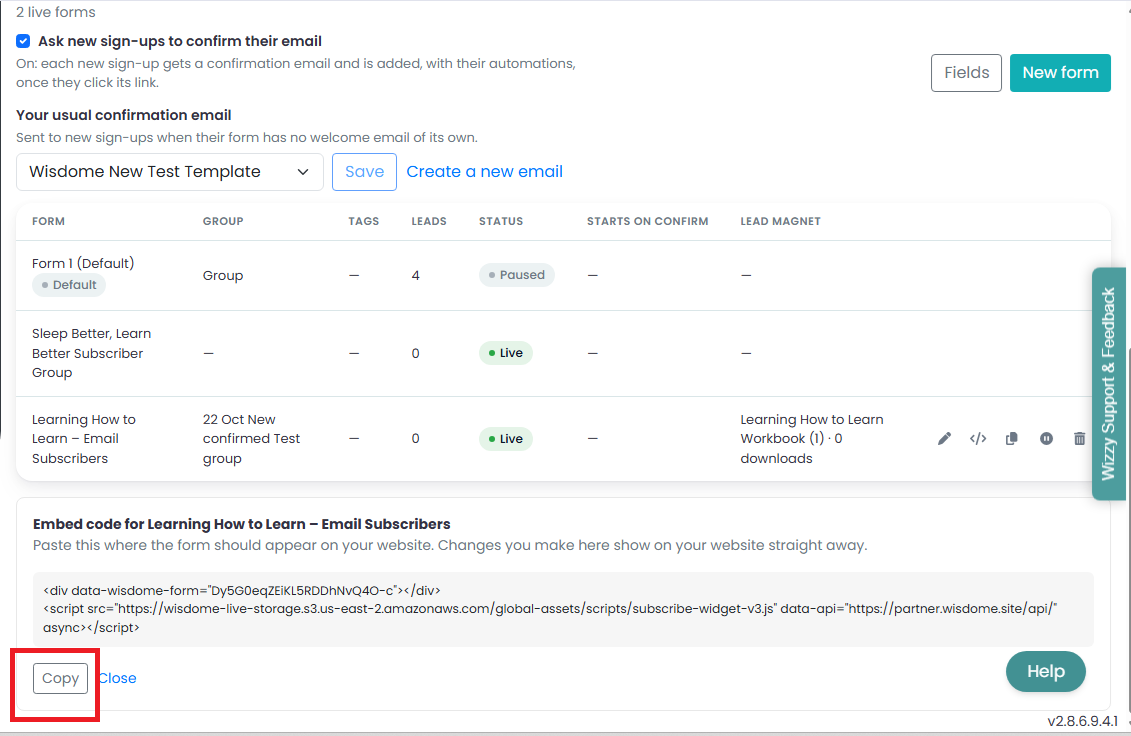
Paste that code into your website. Any edits you make to the form later will update on your site automatically.
Form Preview